
How to create a game server in ProximaClient
ProximaClient is the free, single launcher for ProximaMP products. It lets you create a Minecraft, Counter-Strike 1.6, Day of Defeat, Condition Zero or Sven Co-op server right on your PC — no hosting to rent, no command line, no manual setup. Let's go through how to create a game server in ProximaClient: the creation window is the same for every game.
Before you start
- Download and install ProximaClient for Windows: download →.
- To open the server to friends through a public tunnel, you'll need a ProximaMP account.
How the creation window works
Open ProximaClient, go to the Game servers screen — the gamepad icon in the left menu — and click Add server.
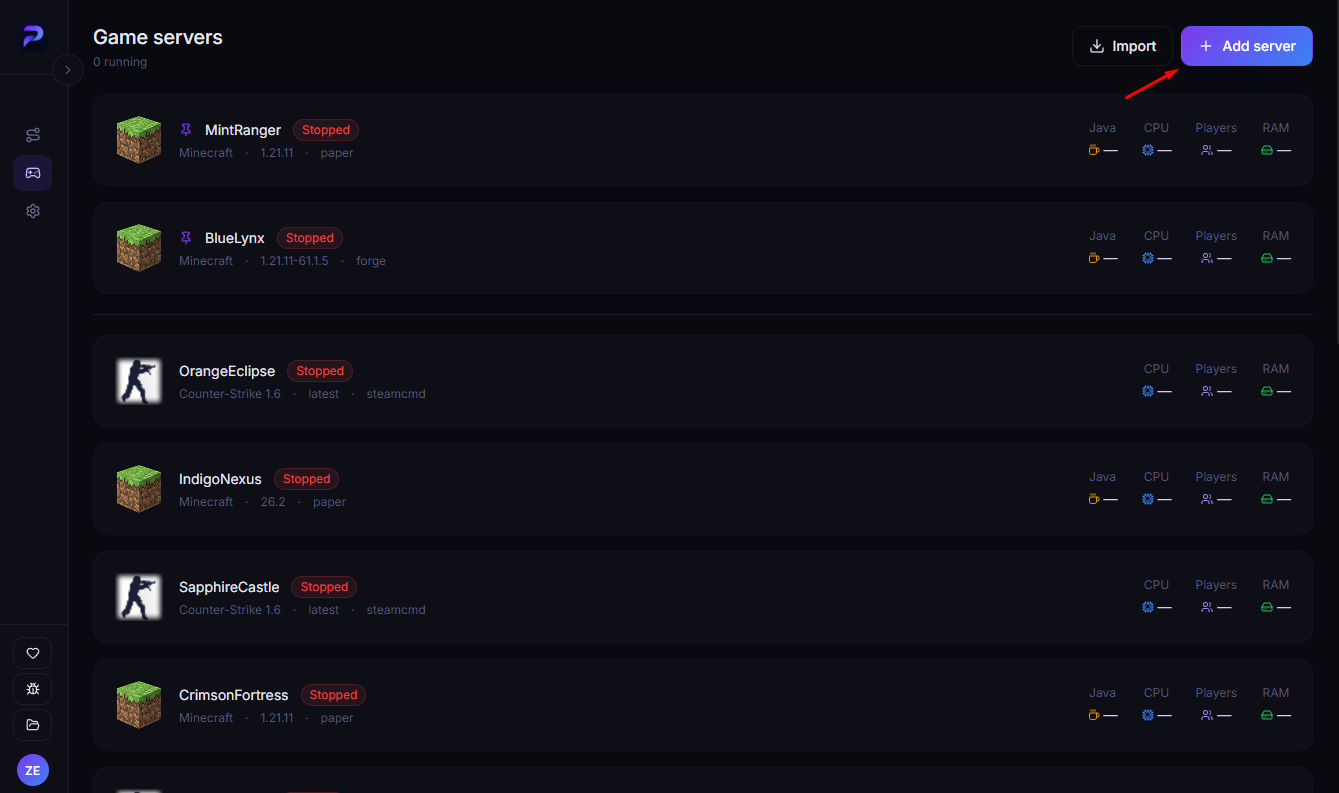
The Create game server window opens. It has three steps — Game, Build and Setup — and the indicator at the bottom shows which one you're on. Sven Co-op has two: the game has a single build, so the window goes straight to setup.
Step 1. Game
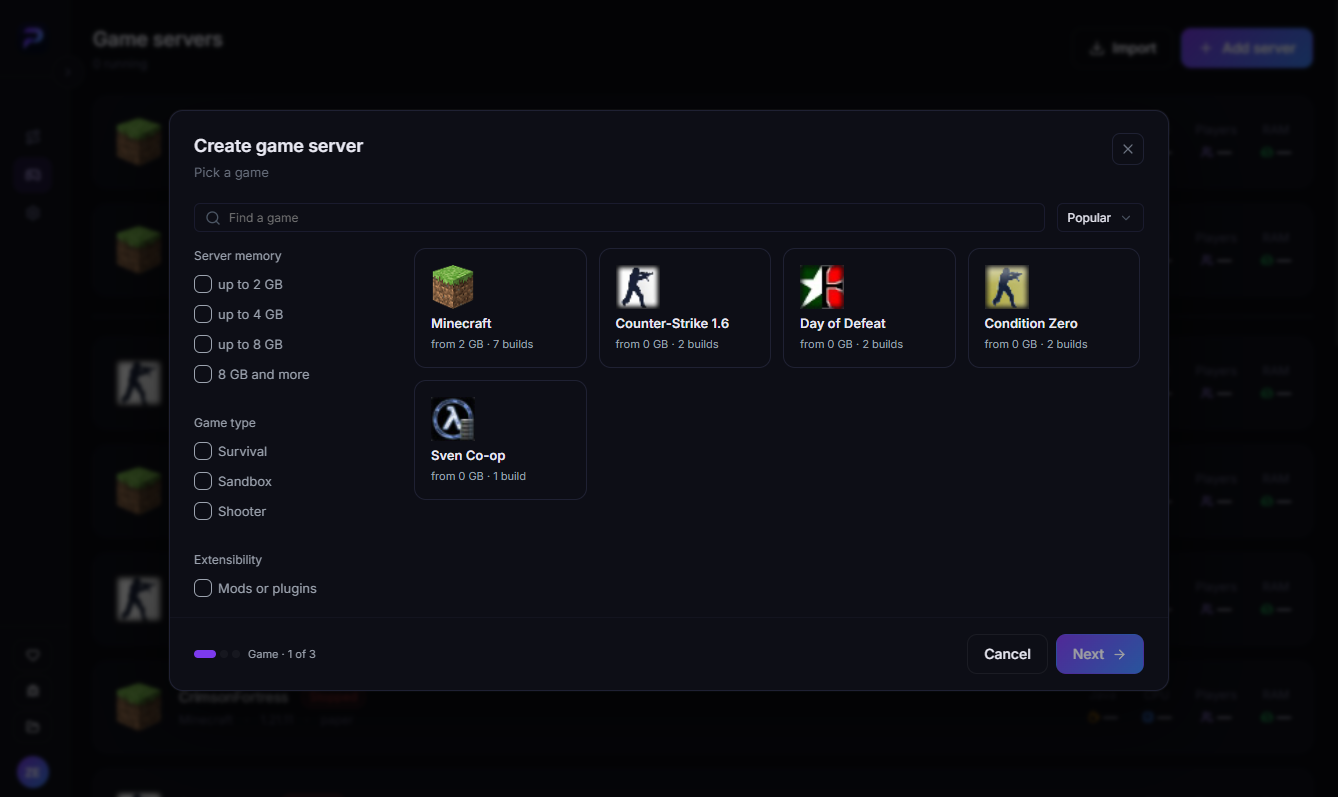
Pick a game and click Next. You can narrow the list down with the search and the filters on the left: Server memory (up to 2 GB, up to 4 GB, up to 8 GB, 8 GB and more), Game type (Survival, Sandbox, Shooter) and Extensibility — Mods or plugins. Each game card shows the minimum memory it needs and how many builds it has.
Step 2. Build
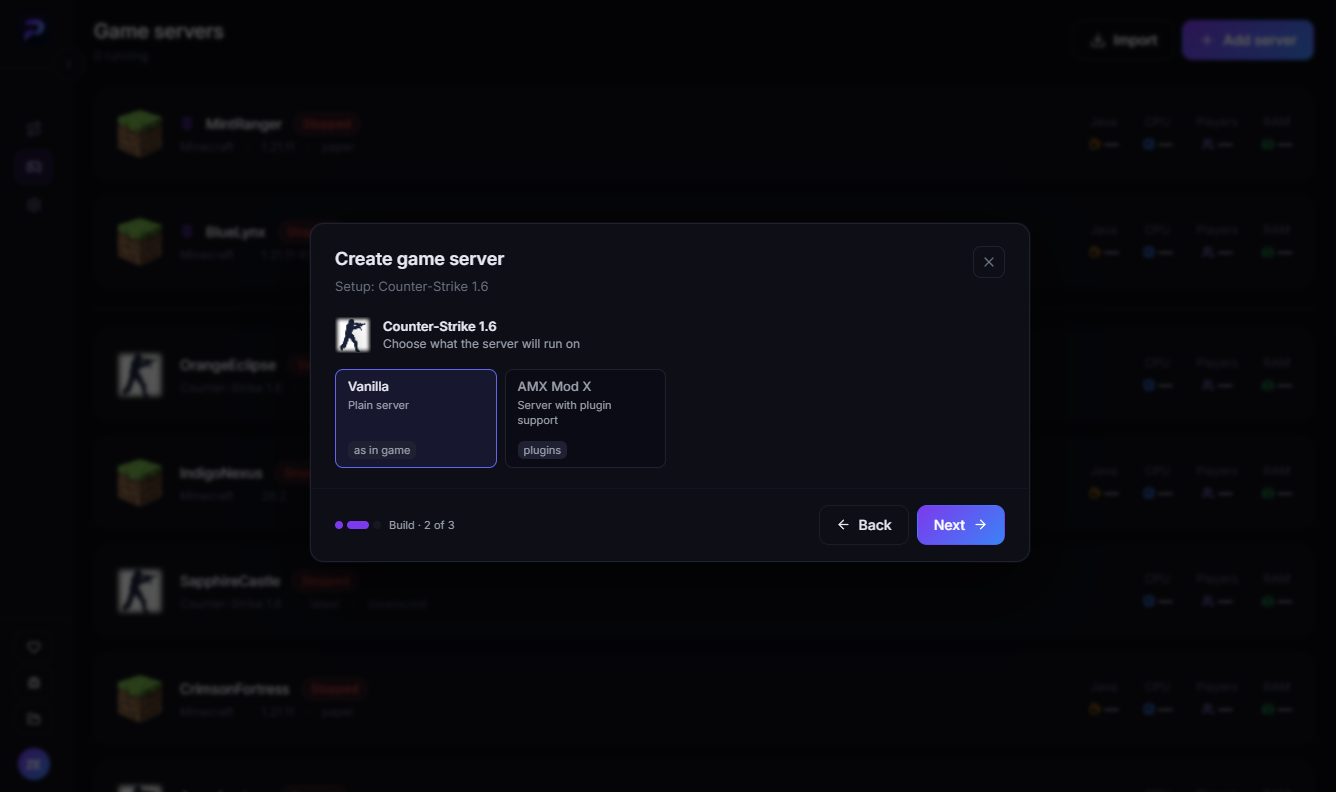
This is where you choose what the server will run on. Each game has its own set:
| Game | Builds | What else to choose |
|---|---|---|
| Minecraft | Custom build — one of seven cores: Paper, Vanilla, Purpur, Folia, Forge, NeoForge or Velocity. Or Template — a ready-made server | For a custom build — Minecraft version and server memory |
| Counter-Strike 1.6, Day of Defeat, Condition Zero | Vanilla, a plain server, or AMX Mod X, a server with plugin support | — |
| Sven Co-op | A single build, Vanilla — the step is skipped | — |
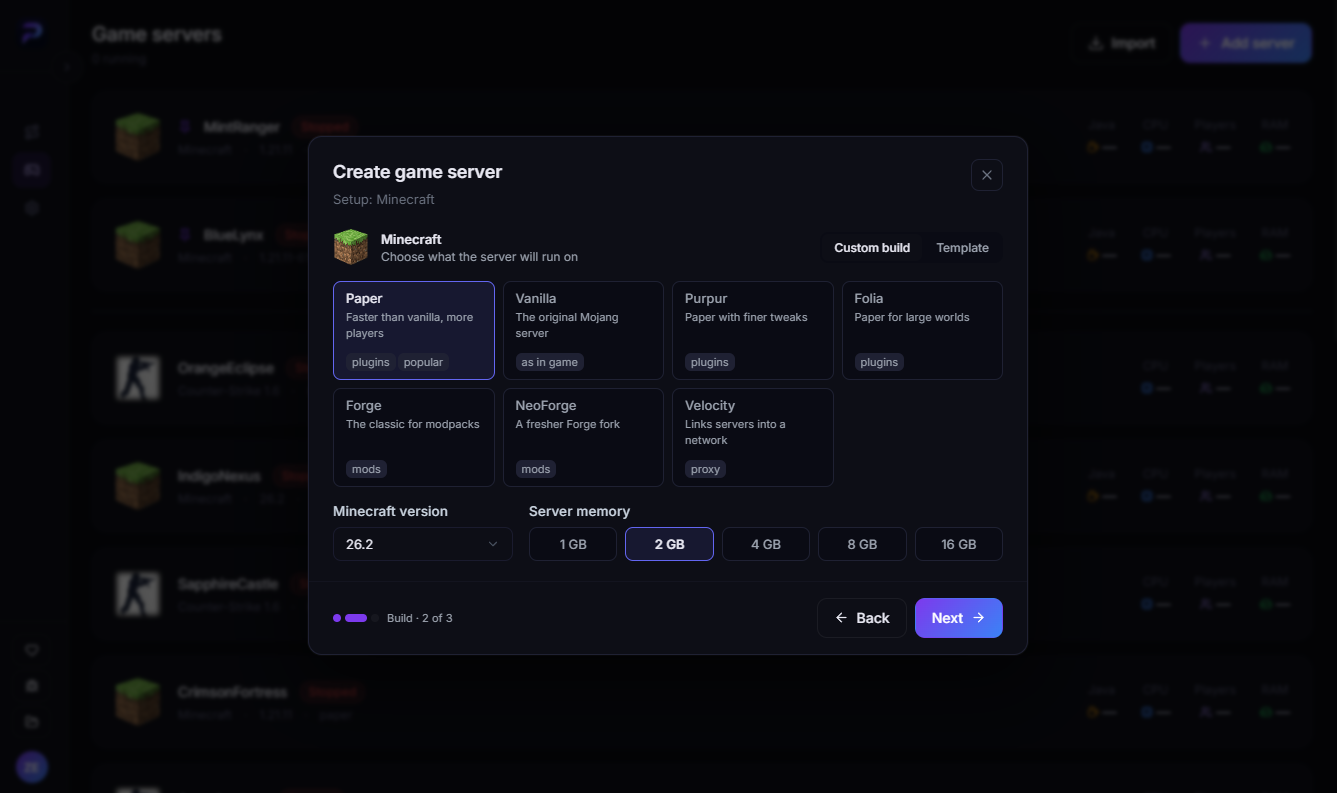
How the Minecraft cores differ and which one to pick — in How to create a Minecraft server in ProximaClient.
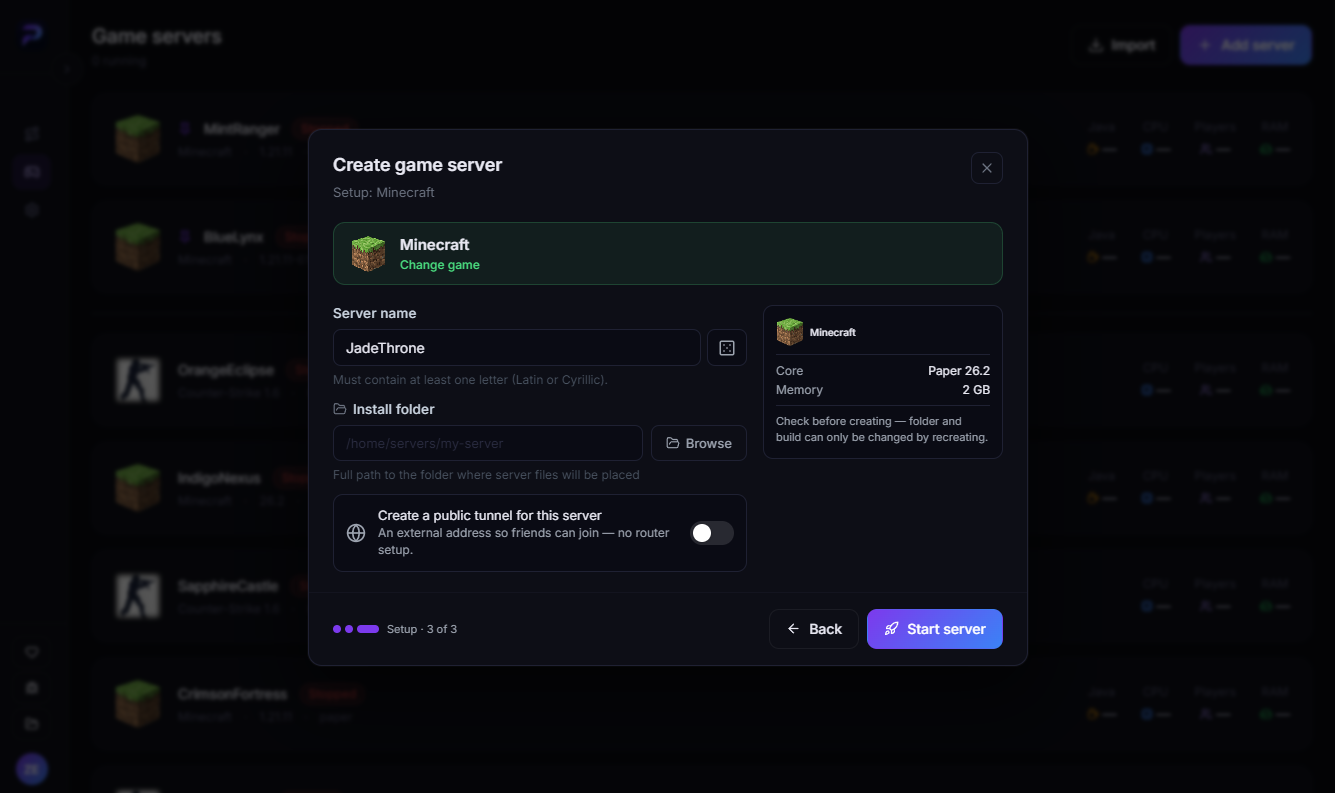
Step 3. Setup
- Server name — type your own or generate one with the dice button. It must contain at least one letter, Latin or Cyrillic.
- Install folder — the full path to the folder where the server files will be placed. You can pick it with Browse.
- Create a public tunnel for this server — this toggle gives the server an external address, so friends can join without router setup. The tunnel works for every game and requires a ProximaMP account. More on the ProximaTunnel page.
On the right there's a summary: the core, plus its version and the memory for Minecraft. Check it before creating — the folder and the build can only be changed by recreating the server. To pick a different game, click Change game on the card at the top. If everything's right, click Start server.
What happens next
ProximaClient downloads the server files and starts the server for you. Only Minecraft shows the Minecraft EULA window on the first start: tick the agreement checkbox and click Accept and start.
Game guides
- How to create a Minecraft server in ProximaClient
- How to create a CS 1.6 server in ProximaClient
- How to create a Day of Defeat server in ProximaClient
- How to create a Condition Zero server in ProximaClient
- How to create a Sven Co-op server in ProximaClient
FAQ
Does the server run on my computer? Yes. The server runs on your PC, no hosting to rent.
Do I need a public IP for friends to join? No, if you turn on the public tunnel: the server gets an external address. The tunnel requires a ProximaMP account.
Can I change the folder or the build later? Only by recreating the server. That's why it's worth checking the summary on the last step.
I already have a server. Can I add it to ProximaClient? There's an Import button on the Game servers screen for that.
Create your server
Download ProximaClient for Windows → — and set up a server for your friends in a couple of minutes.